
Autolay LogoAUTOLAY
Vloercalculator
Geautomatiseerd vloeren leggen
Legplan makengratis starten
Aan de slagTutorialGidsen
Probeer de demo
Plattegrond3D-scanBIM
VloerlegrobotWerkwijzeTechnologieDiensten boekenRobotdashboardinloggen
Autolay
Vloercalculator
Legplan makenAan de slagTutorialGidsen
Probeer de demo
Plattegrond3D-scanBIM
Geautomatiseerd vloeren leggen
VloerlegrobotWerkwijzeTechnologieDiensten boekenRobotdashboardinloggen
Taal
Autolay Logo
AUTOLAYAutomated Flooring

Bedrijf

Over onsNieuwsbrief

Service

KlantenserviceOnze dienstenAPI voor ontwikkelaars
© 2026 Autolay. Alle rechten voorbehouden.
ColofonPrivacybeleidAlgemene voorwaardenHerroepingsrechtCookies

Wij hechten waarde aan uw privacy

Wij gebruiken cookies voor websitestatistieken (Google Analytics).

We gebruiken cookies om ons websiteverkeer te analyseren met Google Analytics en uw ervaring te verbeteren. Lees meer over hoe wij met uw gegevens omgaan in onze privacyverklaring en ons cookiebeleid.

"Alles accepteren" schakelt Google Analytics in, zodat we kunnen zien hoe de site wordt gebruikt. "Alleen essentiële accepteren" activeert geen analytische cookies — er worden alleen de cookies geplaatst die nodig zijn om de site te laten werken.

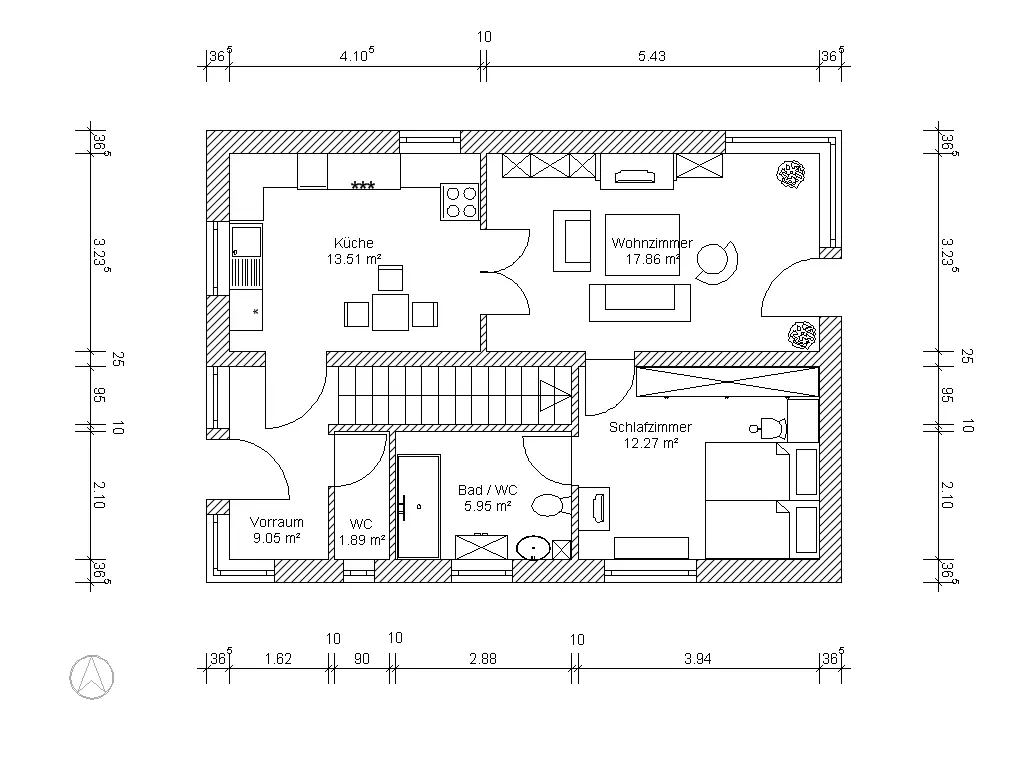
A photographed architectural floor plan with dimension lines and room labels.
File import

Turn a Floor Plan Photo Into a Layout Plan

Photograph the plan on the kitchen table, drop in the architect's PDF, or bring an IFC model or a 3D scan. Set the scale once, trace the room — or let the planner find it — and you get a real layout plan: every plank placed, counted and priced. No redrawing the room wall by wall.

Try it on the demo plan →
Setting-out from the traced planPLAN
NET 20,0 m²TILES 66WASTE 8,0 %

Most free planners start with an empty canvas: you measure the room, then redraw every wall with the mouse. If a drawing of the room already exists — as a photo, a PDF, a DXF, an IFC model or a scan — that work has been done once already. Autolay reads the file and lets you trace on top of it, so the room in the planner is the room on the drawing.

From photo to layout plan in three steps

  1. 1

    Bring the drawing in

    Drag the file onto the planner: a phone photo or screenshot (JPG, PNG, WEBP), a PDF, a DXF, an IFC/BIM model or a 3D scan (GLB, GLTF, OBJ, PLY). The drawing opens in your browser — nothing has to be e-mailed anywhere.

  2. 2

    Set the scale and trace the room

    Draw over one length you know — a door width, a dimension line — and type it in; every number after that is in real metres. Then trace the outline, or click into the room and let the built-in segmentation find the walls. Several rooms, recesses and door openings are all allowed, and an IFC model brings its named spaces with it.

  3. 3

    Get the layout plan

    Pick the material and the laying direction, and the planner places every plank or tile: the piece count, the cut pieces at the walls, the waste percentage and the material cost. Save the project, or export the laying plan and the shopping list as one download.

Why importing the drawing beats redrawing it

In the July 2026 interface audit of the free floor planners, none of them took a file of your room: the outline had to be drawn by hand, from measurements you take yourself. Importing it changes four things:

  • The room comes from the drawing, not from your memory of it — recesses, niches and door openings are already in the right place.
  • One scale calibration replaces measuring every wall; everything after it is in real metres.
  • The formats a job actually arrives in: photo, screenshot, PDF, DXF, IFC/BIM and 3D scans — no proprietary import format.
  • Nothing sits behind an e-mail address or an account: upload, trace, read the plan.

Try it on the demo floor plan

The demo plan opens in the planner exactly the way your own photo would: set the scale, trace the room, pick a material and read the counts. Bring your own file in whenever you are ready.
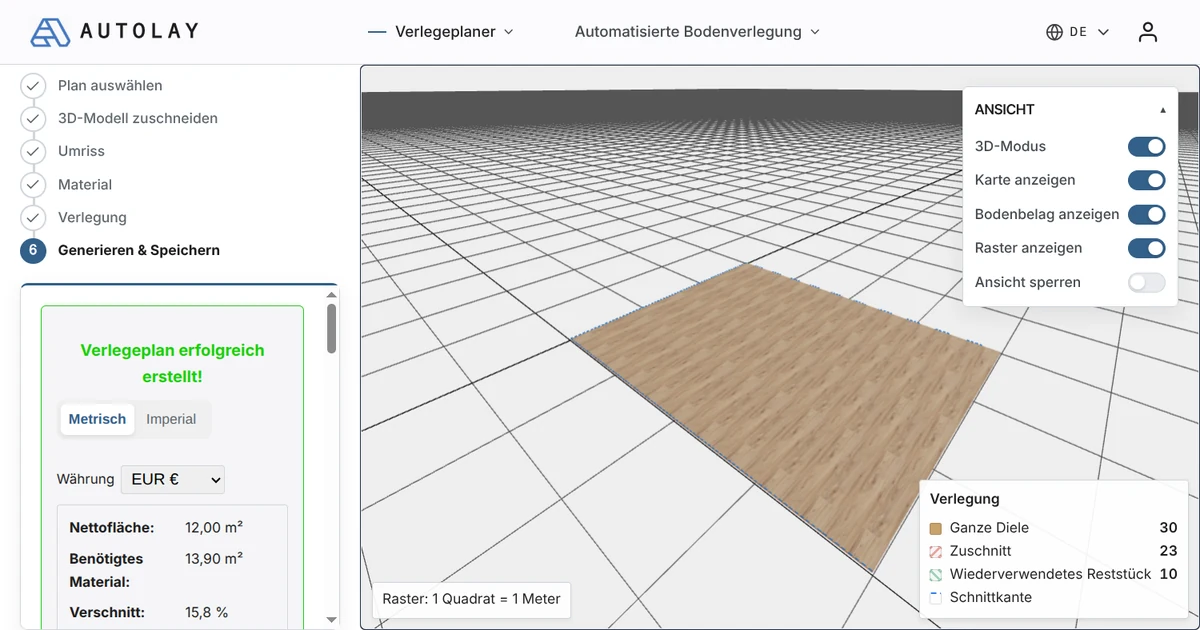
The Autolay planner with a traced floor plan and a panel of piece count, waste percentage and material cost.
The traced plan, laid out and counted — piece count, waste percentage and cost, before anything is ordered.
Open the demo plan →

Floor plan upload FAQ

Which files can I upload?
Photos and screenshots (JPG, PNG, WEBP, GIF, BMP, SVG), PDF drawings, DXF, IFC/BIM models and 3D scans (GLB, GLTF, OBJ, PLY). DWG is not read — export it as DXF or PDF first.
Does it have to be a proper architectural drawing?
No. A phone photo of a printed plan, a screenshot from a listing or a hand sketch with one known length all work: the scale comes from the length you calibrate, not from the file.
How does the planner know the real dimensions?
You draw over a length you know — a door width, a dimension line, a wall — and type it in. Everything after that is computed in metres. DXF and IFC files carry their own units and need no calibration.
Is it free, and do I need an account?
The planner is free in the browser and runs without an account. You only sign up if you want to save the project and come back to it later.

Vloergidsen

Ontdek hoe autolay een vloer meet, plant en calculeert:

  • Hoeveelheden uit BIMBereken de materiaalhoeveelheden voor uw vloer rechtstreeks uit een IFC/BIM-model: hoe Autolay ruimtecontouren uit IfcSpace-geometrie leest in plaats van ze met de hand over te tekenen.
  • Vloer uit 3D-scanBereken uw vloermateriaal rechtstreeks uit een LiDAR- of 3D-scan: hoe Autolay een puntenwolk omzet in een ruimtecontour en een materiaalstaat.
  • Legplan-softwareWat legplan-software moet kunnen: van plattegrond naar legplan met de exacte materiaallijst, het versnijdingspercentage en de zaaglijst — plus een gratis planner in de browser.

Alle gidsen →