
Autolay LogoAUTOLAY
Calculadora de suelos
Colocación de suelos automatizada
Crear un plan de colocaciónempezar gratis
Primeros pasosTutorialGuías
Probar la demo
Plano 2DEscaneo 3DBIM
Robot instalador de suelosProcesoTecnologíaReservar serviciosPanel del robotiniciar sesión
Autolay
Calculadora de suelos
Crear un plan de colocaciónPrimeros pasosTutorialGuías
Probar la demo
Plano 2DEscaneo 3DBIM
Colocación de suelos automatizada
Robot instalador de suelosProcesoTecnologíaReservar serviciosPanel del robotiniciar sesión
Idioma
Autolay Logo
AUTOLAYAutomated Flooring

Empresa

Sobre nosotrosBoletín

Servicio

Atención al clienteNuestros serviciosAPI para desarrolladores
© 2026 Autolay. Todos los derechos reservados.
Aviso legalPolítica de privacidadTérminos y condicionesDerecho de desistimientoCookies

Valoramos tu privacidad

Usamos cookies para las estadísticas del sitio (Google Analytics).

Utilizamos cookies para analizar el tráfico de nuestro sitio web con Google Analytics y mejorar tu experiencia. Puedes obtener más información sobre cómo tratamos tus datos en nuestra política de privacidad y nuestra política de cookies.

«Aceptar todas» activa Google Analytics para que podamos ver cómo se usa el sitio. «Aceptar solo las esenciales» no activa ninguna cookie de análisis: solo se instalan las cookies necesarias para que el sitio funcione.

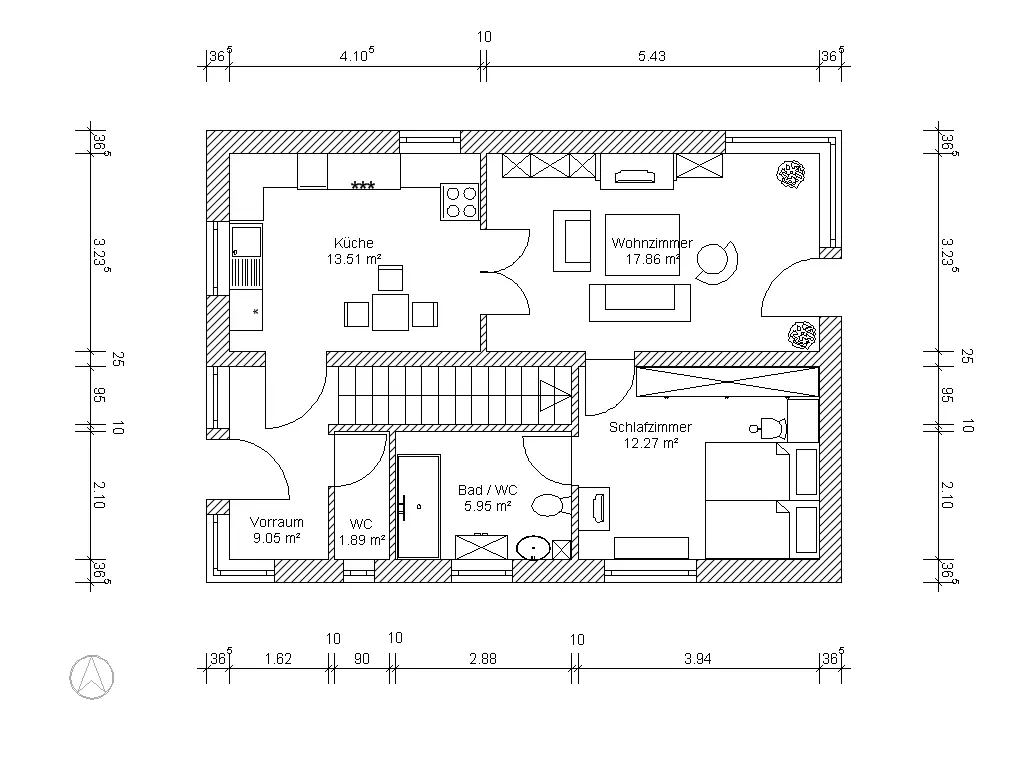
A photographed architectural floor plan with dimension lines and room labels.
File import

Turn a Floor Plan Photo Into a Layout Plan

Photograph the plan on the kitchen table, drop in the architect's PDF, or bring an IFC model or a 3D scan. Set the scale once, trace the room — or let the planner find it — and you get a real layout plan: every plank placed, counted and priced. No redrawing the room wall by wall.

Try it on the demo plan →
Setting-out from the traced planPLAN
NET 20,0 m²TILES 66WASTE 8,0 %

Most free planners start with an empty canvas: you measure the room, then redraw every wall with the mouse. If a drawing of the room already exists — as a photo, a PDF, a DXF, an IFC model or a scan — that work has been done once already. Autolay reads the file and lets you trace on top of it, so the room in the planner is the room on the drawing.

From photo to layout plan in three steps

  1. 1

    Bring the drawing in

    Drag the file onto the planner: a phone photo or screenshot (JPG, PNG, WEBP), a PDF, a DXF, an IFC/BIM model or a 3D scan (GLB, GLTF, OBJ, PLY). The drawing opens in your browser — nothing has to be e-mailed anywhere.

  2. 2

    Set the scale and trace the room

    Draw over one length you know — a door width, a dimension line — and type it in; every number after that is in real metres. Then trace the outline, or click into the room and let the built-in segmentation find the walls. Several rooms, recesses and door openings are all allowed, and an IFC model brings its named spaces with it.

  3. 3

    Get the layout plan

    Pick the material and the laying direction, and the planner places every plank or tile: the piece count, the cut pieces at the walls, the waste percentage and the material cost. Save the project, or export the laying plan and the shopping list as one download.

Why importing the drawing beats redrawing it

In the July 2026 interface audit of the free floor planners, none of them took a file of your room: the outline had to be drawn by hand, from measurements you take yourself. Importing it changes four things:

  • The room comes from the drawing, not from your memory of it — recesses, niches and door openings are already in the right place.
  • One scale calibration replaces measuring every wall; everything after it is in real metres.
  • The formats a job actually arrives in: photo, screenshot, PDF, DXF, IFC/BIM and 3D scans — no proprietary import format.
  • Nothing sits behind an e-mail address or an account: upload, trace, read the plan.

Try it on the demo floor plan

The demo plan opens in the planner exactly the way your own photo would: set the scale, trace the room, pick a material and read the counts. Bring your own file in whenever you are ready.
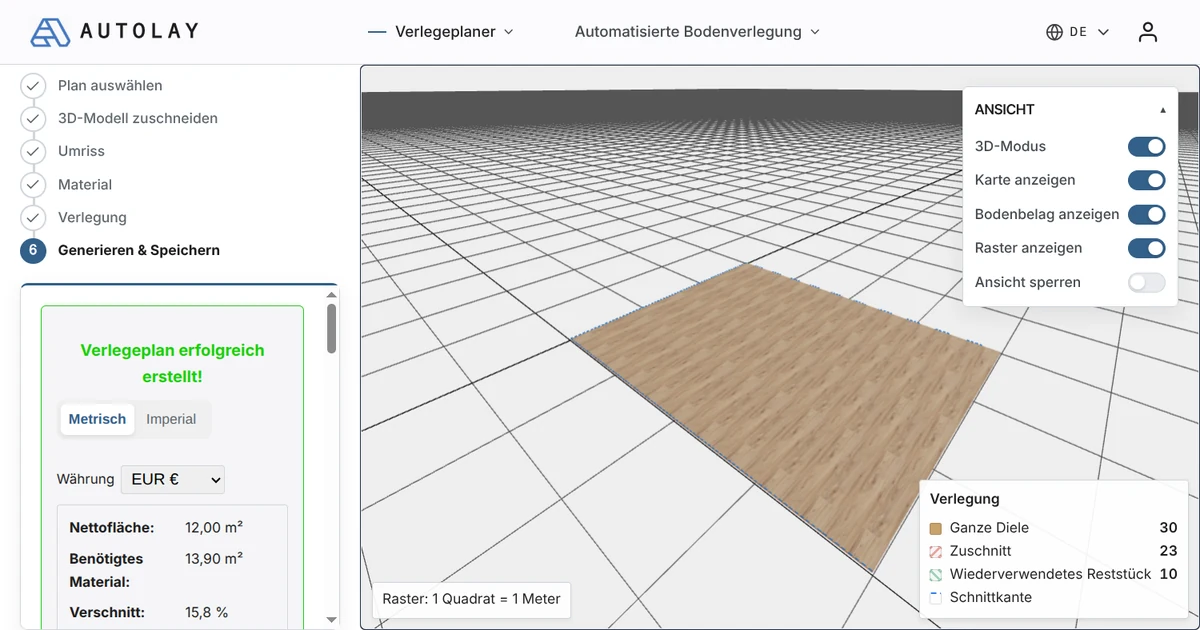
The Autolay planner with a traced floor plan and a panel of piece count, waste percentage and material cost.
The traced plan, laid out and counted — piece count, waste percentage and cost, before anything is ordered.
Open the demo plan →

Floor plan upload FAQ

Which files can I upload?
Photos and screenshots (JPG, PNG, WEBP, GIF, BMP, SVG), PDF drawings, DXF, IFC/BIM models and 3D scans (GLB, GLTF, OBJ, PLY). DWG is not read — export it as DXF or PDF first.
Does it have to be a proper architectural drawing?
No. A phone photo of a printed plan, a screenshot from a listing or a hand sketch with one known length all work: the scale comes from the length you calibrate, not from the file.
How does the planner know the real dimensions?
You draw over a length you know — a door width, a dimension line, a wall — and type it in. Everything after that is computed in metres. DXF and IFC files carry their own units and need no calibration.
Is it free, and do I need an account?
The planner is free in the browser and runs without an account. You only sign up if you want to save the project and come back to it later.

Guías de instalación

Descubre cómo autolay mide, planifica y presupuesta un suelo:

  • Mediciones desde BIMCalcula las mediciones de material de suelo directamente desde un modelo IFC/BIM: cómo Autolay lee los contornos de las estancias de la geometría IfcSpace en lugar de redibujarlos a mano.
  • Suelo desde escaneo 3DCalcula el material de suelo directamente desde un escaneo LiDAR o 3D: cómo Autolay convierte una nube de puntos en un contorno de estancia y en una medición de materiales.
  • Software de instalaciónQué tiene que hacer un software de plano de instalación: convertir un plano en un replanteo con la lista de materiales exacta, el porcentaje de desperdicio y la lista de cortes, más una herramienta gratuita en el navegador.

Todas las guías →