
Autolay LogoAUTOLAY
Calculadora de pisos
Aplicação de pisos automatizada
Criar um plano de assentamentocomeçar grátis
Primeiros passosTutorialGuias
Experimentar a demo
PlantaDigitalização 3DBIM
Robô de aplicação de pavimentosProcessoTecnologiaReservar serviçosPainel do robôiniciar sessão
Autolay
Calculadora de pisos
Criar um plano de assentamentoPrimeiros passosTutorialGuias
Experimentar a demo
PlantaDigitalização 3DBIM
Aplicação de pisos automatizada
Robô de aplicação de pavimentosProcessoTecnologiaReservar serviçosPainel do robôiniciar sessão
Idioma
Autolay Logo
AUTOLAYAutomated Flooring

Empresa

Sobre nósNewsletter

Serviço

Apoio ao clienteOs nossos serviçosAPI para programadores
© 2026 Autolay. Todos os direitos reservados.
Ficha técnicaPolítica de privacidadeTermos e condiçõesDireito de livre resoluçãoCookies

Valorizamos a sua privacidade

Utilizamos cookies para as estatísticas do site (Google Analytics).

Utilizamos cookies para analisar o tráfego do nosso site com o Google Analytics e melhorar a sua experiência. Pode saber mais sobre como tratamos os seus dados na nossa política de privacidade e na nossa política de cookies.

«Aceitar tudo» ativa o Google Analytics para que possamos ver como o site é utilizado. «Aceitar apenas os essenciais» não ativa nenhum cookie de análise — apenas são definidos os cookies necessários para o funcionamento do site.

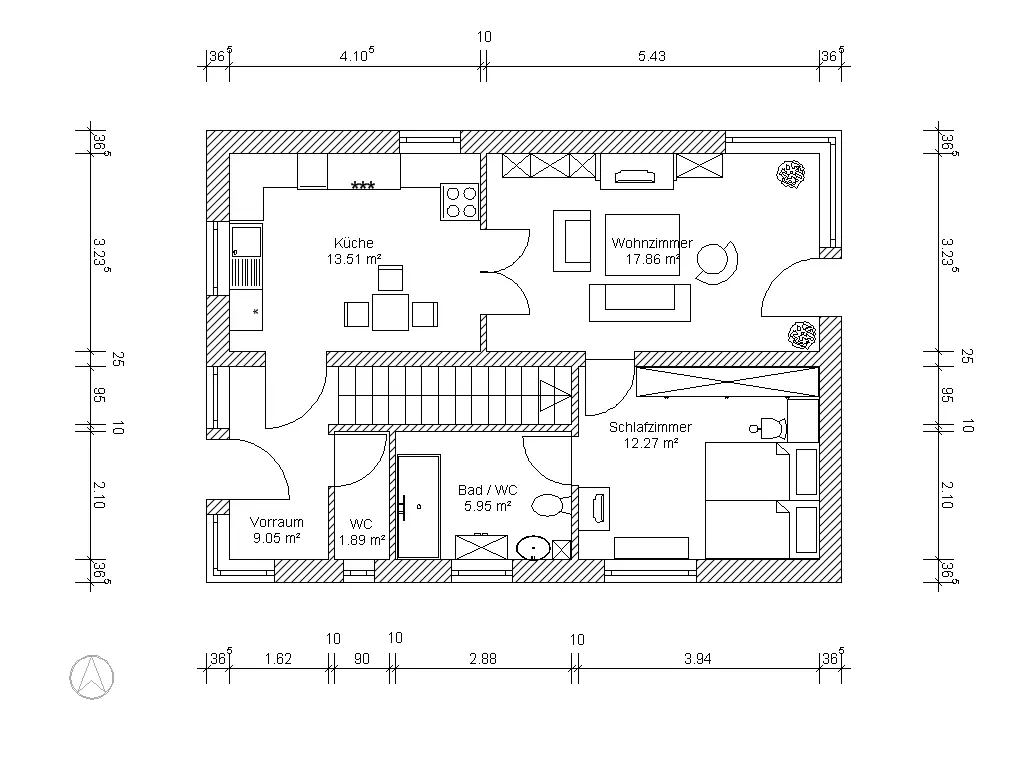
A photographed architectural floor plan with dimension lines and room labels.
File import

Turn a Floor Plan Photo Into a Layout Plan

Photograph the plan on the kitchen table, drop in the architect's PDF, or bring an IFC model or a 3D scan. Set the scale once, trace the room — or let the planner find it — and you get a real layout plan: every plank placed, counted and priced. No redrawing the room wall by wall.

Try it on the demo plan →
Setting-out from the traced planPLAN
NET 20,0 m²TILES 66WASTE 8,0 %

Most free planners start with an empty canvas: you measure the room, then redraw every wall with the mouse. If a drawing of the room already exists — as a photo, a PDF, a DXF, an IFC model or a scan — that work has been done once already. Autolay reads the file and lets you trace on top of it, so the room in the planner is the room on the drawing.

From photo to layout plan in three steps

  1. 1

    Bring the drawing in

    Drag the file onto the planner: a phone photo or screenshot (JPG, PNG, WEBP), a PDF, a DXF, an IFC/BIM model or a 3D scan (GLB, GLTF, OBJ, PLY). The drawing opens in your browser — nothing has to be e-mailed anywhere.

  2. 2

    Set the scale and trace the room

    Draw over one length you know — a door width, a dimension line — and type it in; every number after that is in real metres. Then trace the outline, or click into the room and let the built-in segmentation find the walls. Several rooms, recesses and door openings are all allowed, and an IFC model brings its named spaces with it.

  3. 3

    Get the layout plan

    Pick the material and the laying direction, and the planner places every plank or tile: the piece count, the cut pieces at the walls, the waste percentage and the material cost. Save the project, or export the laying plan and the shopping list as one download.

Why importing the drawing beats redrawing it

In the July 2026 interface audit of the free floor planners, none of them took a file of your room: the outline had to be drawn by hand, from measurements you take yourself. Importing it changes four things:

  • The room comes from the drawing, not from your memory of it — recesses, niches and door openings are already in the right place.
  • One scale calibration replaces measuring every wall; everything after it is in real metres.
  • The formats a job actually arrives in: photo, screenshot, PDF, DXF, IFC/BIM and 3D scans — no proprietary import format.
  • Nothing sits behind an e-mail address or an account: upload, trace, read the plan.

Try it on the demo floor plan

The demo plan opens in the planner exactly the way your own photo would: set the scale, trace the room, pick a material and read the counts. Bring your own file in whenever you are ready.
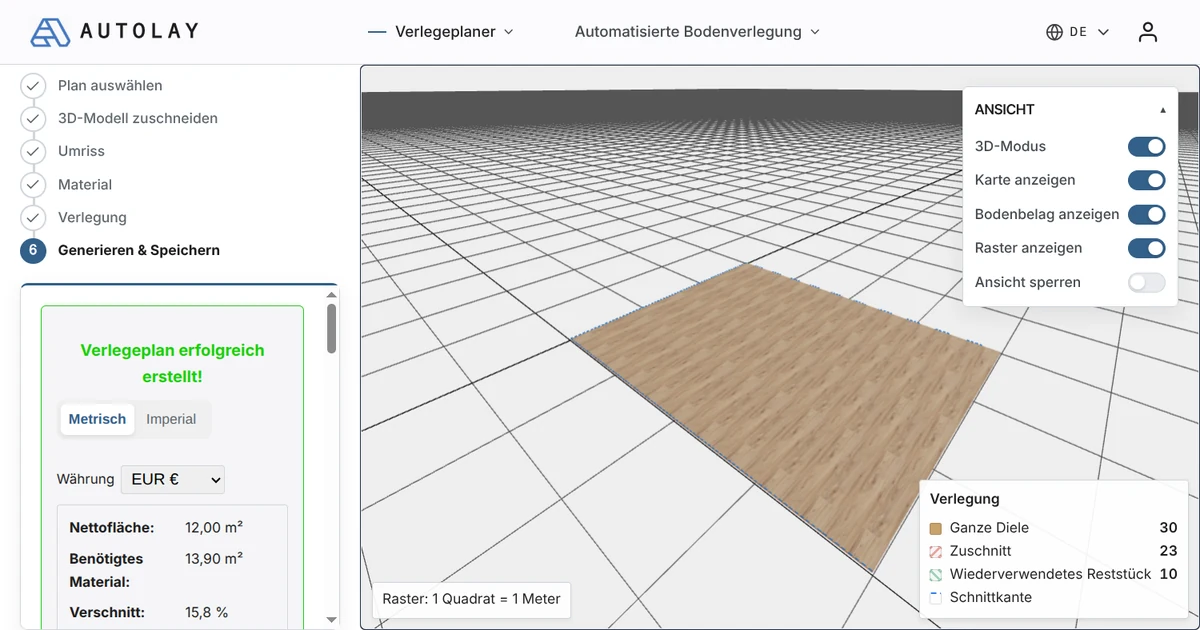
The Autolay planner with a traced floor plan and a panel of piece count, waste percentage and material cost.
The traced plan, laid out and counted — piece count, waste percentage and cost, before anything is ordered.
Open the demo plan →

Floor plan upload FAQ

Which files can I upload?
Photos and screenshots (JPG, PNG, WEBP, GIF, BMP, SVG), PDF drawings, DXF, IFC/BIM models and 3D scans (GLB, GLTF, OBJ, PLY). DWG is not read — export it as DXF or PDF first.
Does it have to be a proper architectural drawing?
No. A phone photo of a printed plan, a screenshot from a listing or a hand sketch with one known length all work: the scale comes from the length you calibrate, not from the file.
How does the planner know the real dimensions?
You draw over a length you know — a door width, a dimension line, a wall — and type it in. Everything after that is computed in metres. DXF and IFC files carry their own units and need no calibration.
Is it free, and do I need an account?
The planner is free in the browser and runs without an account. You only sign up if you want to save the project and come back to it later.

Guias de assentamento

Veja como a autolay mede, planeia e orça um pavimento:

  • Medições a partir de BIMCalcule as medições de material de pavimento diretamente a partir de um modelo IFC/BIM: como a Autolay lê os contornos das divisões na geometria IfcSpace em vez de os redesenhar à mão.
  • Pavimento a partir de scan 3DCalcule o material de pavimento diretamente a partir de uma digitalização LiDAR ou 3D: como a Autolay transforma uma nuvem de pontos num contorno de divisão e numa medição de materiais.
  • Software de assentamentoO que um software de plano de assentamento tem de fazer: transformar uma planta num plano de assentamento com a lista de materiais exata, a percentagem de desperdício e a lista de cortes, além de uma ferramenta gratuita no navegador.

Todos os guias →