
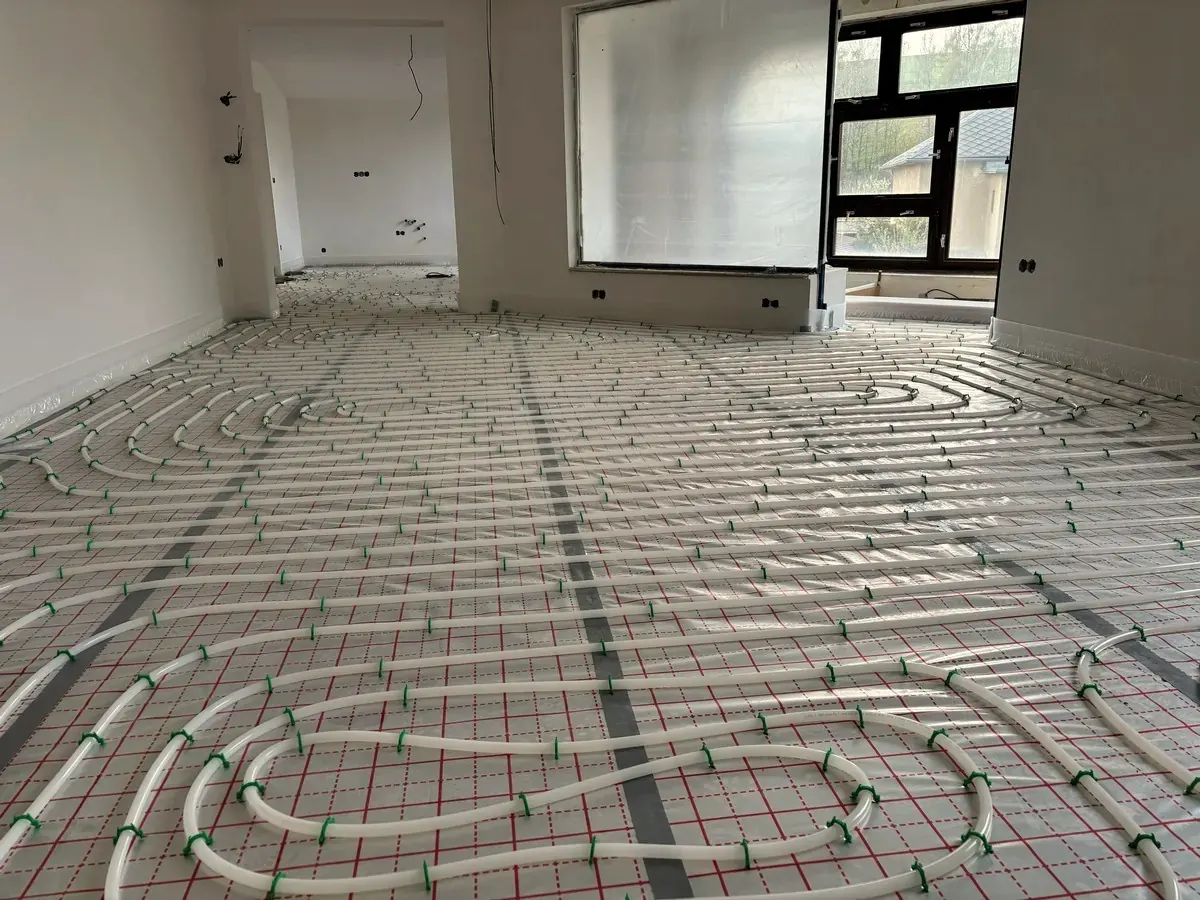
How to lay a vapor barrier: the numbers that matter
A floating floor over screed, concrete or old tile needs a film underneath that holds back residual moisture. This guide covers which film to buy and when the screed is dry enough. It shows how to make the seams tight – and when a film does more harm than good.
Laying the film is the easy part. Roll it out, overlap it, tape it – in a 200 sq ft (20 m²) room that takes less than an hour. It almost always goes wrong somewhere else. Either the film goes onto a subfloor where it does not belong (wood), or onto a screed that is still too wet. All figures here come from the technical leaflets of the European laminate manufacturers' association and from floor manufacturers' installation instructions; they are listed at the end of the page. Your floor's own instructions always take priority.
Who this guide is for
You need this guide if you are floating laminate, engineered wood, cork or click vinyl (no adhesive) over cement screed, calcium sulphate screed (anhydrite), concrete or old tile.
Are you gluing the floor down over its whole surface? Then no film goes in between, because the adhesive needs direct contact with the subfloor. The adhesive and floor manufacturers' moisture limits apply instead.
Is your subfloor wood – boards, particleboard, oriented strand board or joists? Then no polyethylene film goes down at all. The decision table below the steps shows every subfloor at a glance.
Vapor barrier or vapor retarder – what you are really buying
Stores call almost everything a vapor barrier. The number that matters is the vapor-diffusion resistance, given as the sd value: the thickness of still air that would hold back vapor equally well. Under the German building standard for moisture protection (DIN 4108‑3), only a layer with an sd value of 1,500 m or more is a true barrier. Anything from 0.5 m to 1,500 m is a retarder. So the 0.2 mm polyethylene under laminate is strictly a vapor retarder. For this job, that is exactly what it should be.
Don't buy by the name or the thickness alone. Check the stated sd value: 75 m or more. The manufacturers' association stresses that quality counts. Good polyethylene reaches the value from about 0.15 mm, and metallized films at a fraction of that. Many floor warranties require exactly this value over mineral subfloors.
Is the screed dry enough? The limits
A film dries nothing. It only keeps the moisture down, and from there it moves to the edges and into the walls. So the screed has to be ready before you cover it. It is measured with the calcium carbide method. The floor installer takes screed from the lower half, crushes it and tests it in a pressure vessel. The result is given as a percentage, written CM-%. In Germany it is the only on-site method accepted in court.
Limits for laminate and wood floors without underfloor heating: cement screed below 2.0 CM-%, calcium sulphate screed below 0.5 CM-%.
With underfloor heating: calcium sulphate below 0.3 CM-%; cement screed below 1.8 CM-% or 1.5 CM-%, depending on the source. Use your floor manufacturer's stricter value.
Newer leaflets also accept relative humidity measured in the screed (75 % at most). Always note the method next to the reading. A handheld electrical meter from the hardware store gives an estimate, not a go-ahead.
Underfloor heating: what else applies
The film goes down as on any screed. But the whole build-up of film, underlayment and floor may total no more than 0.15 m²K/W thermal resistance, or the heat stops getting through. The manufacturers' association gives a worked example: laminate 0.07 + underlayment 0.04 + film 0.005 = 0.115 m²K/W, which is within the limit. The values are on the data sheets. Add them up before you buy.
Before anything is laid, the screed is heated up and cooled down to a written protocol from the heating installer. The measuring spots are marked so no one drills into a pipe. Without the protocol and markings, do not measure yourself. Before, during and for three days after laying, hold the floor surface at about 64 °F (18 °C); afterwards it should never go above 84 °F (29 °C).
How much film and tape
You buy roll widths, not square feet. Each extra strip covers only the roll width minus the overlap. Example: room 13 × 16 ft (4 × 5 m, 20 m²), film 6.5 ft (2 m) wide, strips along the 16 ft wall. With an 8 in (20 cm) overlap and 1.5 in (4 cm) up each wall, you need 3 strips of 16.7 ft (5.1 m) – about 31 m² of film for 20 m² of floor. A wider roll needs less.
Rule: strips = 1 + round up ((room width + both up-turns − roll width) ÷ (roll width − overlap)). Buy strips × (room length + up-turns) × roll width. The leftover from the last strip usually fits a hallway or alcove.
Tape: the length of all seams (2 × 16.7 ft in the example) plus the room's perimeter if you tape the film to the wall (59 ft). Roughly 100 ft (30 m) for the example room.
Laying a vapor barrier in 8 steps
Identify the subfloor and get the moisture measured
Use the decision table below the steps to check whether a film belongs there at all. On screed, have the moisture measured with the calcium carbide method and get the reading in writing. If it is above the limit, wait and ventilate – don't cover it.
Prepare the room and the flooring
Leave the flooring packed in the room for at least 48 hours, lying flat and not leaning on a wall. During laying and for three days after, keep the air at 64 °F (18 °C) or more, the floor surface at 59 °F (15 °C) or more and relative humidity between 40 and 75 %. With underfloor heating, hold the floor surface at about 64 °F (18 °C) during this time.
Sweep and vacuum the subfloor
Every grain of screed under the film becomes a hole later. Sweep thoroughly, vacuum and scrape off mortar and adhesive residue. Fill larger dips with leveling compound first, not with the underlayment.
Lay the first strip along the long wall
Roll the first strip along the longest wall and let it stand 1–1.5 in (2–4 cm) up the wall. Don't stretch it: it should lie flat and wrinkle-free but relaxed. Fold the film into inside corners instead of cutting it. A cut is a hole.
Overlap strips 8–12 in and tape them
Overlap each new strip 8–12 in (20–30 cm) over the last. Tape the seam along its full length with moisture-resistant tape, centered on the edge of the top strip, and rub it down. The film is only as tight as its worst seam.
Fix the edge and inspect the film
Tape the turned-up edge to the wall so it doesn't slip down while you work. Then walk the floor once and tape over every hole and tear. Around heating pipes and door frames, cut a small star, push the film around and tape it tight.
Lay the underlayment and the floor
The underlayment goes on top of the film, edge to edge and not overlapped, or you get bumps. If the underlayment has a built-in barrier, tape its seams just as tightly as a film. Then lay the floor with the expansion gap your manufacturer specifies (often around 3/8 in, 10 mm). Don't walk on the film with grit on your shoes.
Fit the baseboards, then trim the film
Leave the turned-up edge standing until the baseboards are on. Then trim the film with a utility knife just below the top of the baseboard so nothing shows. With underfloor heating, raise the temperature slowly only after three days, and keep the floor surface below 84 °F (29 °C).
Do I need a film? Decide by subfloor
| Subfloor | Film? | What to watch |
|---|---|---|
| Cement screed, calcium sulphate screed, concrete | Yes, always | sd value of 75 m or more: 0.2 mm polyethylene, or an underlayment with an equivalent built-in layer. Even an old, dry screed still releases some moisture. |
| Old tile or natural stone | Yes | Just as on screed: grout lines and the screed underneath let vapor through. |
| Firmly bonded vinyl sheet or linoleum | No extra film | The covering already blocks the vapor – only if it is firmly stuck down, with no loose areas or cracks, and there is no underfloor heating. Remove any carpet first. |
| Wood boards, particleboard, oriented strand board, joisted floor | No polyethylene film | Under a tight film, condensation forms and the wood rots; manufacturers prohibit it. Wood moisture 10 % or less, a ventilated, dry space underneath, ventilated baseboards. |
| Screed with underfloor heating | Yes | Film, underlayment and floor together no more than 0.15 m²K/W; heating protocol from the heating installer before laying. |
| Basement floor or slab on grade | Yes, but it is not waterproofing | Damp walls, white salt deposits or a musty smell mean the building's waterproofing is missing (German standard DIN 18533). No film fixes that – ask a specialist first. |
| Floor glued down over its whole surface | No | The adhesive needs direct contact with the subfloor. The adhesive and floor manufacturers' moisture limits apply. |
Tools and materials
| Item | Quantity |
|---|---|
| Polyethylene film 0.2 mm, sd value 75 m or more (or an underlayment with a built-in layer of the same value) | By roll width with the formula above – about 31 m² for a 20 m² room |
| Moisture-resistant tape, 2 in (50 mm) wide – not masking or packing tape, they let go after a few months | Seam length plus perimeter – about 100 ft (30 m) for the example room |
| Written calcium carbide moisture reading from a floor installer | Before every screed you cover |
| Utility knife | 1 |
| Tape measure | 1 |
| Broom and vacuum | 1 each |
| Leveling compound for larger dips | As needed |
| Double-sided tape for the wall edge | Optional |
Common mistakes
Polyethylene film over wood boards or particleboard
How to spot it: Later a smell and dark stains along the board edges – the wood molds underneath
Fix: Lift the floor, take the film out, let the wood dry and relay without polyethylene film
Laying over screed that is still too wet
How to spot it: Weeks later the edges near the walls swell
Fix: Have the moisture measured before you start; once it has happened, lift the floor and let the screed dry below the limit
Untaped seams or no up-turn at the wall
How to spot it: Moisture comes up at the edges and joints
Fix: Check every seam and the 1–1.5 in (2–4 cm) up-turn before the underlayment goes down
An underlayment with a built-in barrier but open seams
How to spot it: Gaps between the underlayment sheets – then it isn't a barrier
Fix: Close the seams with the underlayment's own strip or moisture-resistant tape
Too much insulation over underfloor heating
How to spot it: Rooms won't warm up because the build-up exceeds 0.15 m²K/W
Fix: Add up the data-sheet values before you buy
Film cut into inside corners
How to spot it: A slit or gap where two walls meet
Fix: Fold the film into the corner; tape over any cut already made
Underlayment overlapped instead of laid edge to edge
How to spot it: Bumps under the floor along the underlayment seams
Fix: Lay the underlayment edge to edge
When to call a professional
Always for the moisture measurement. The equipment and the judgment belong to the floor installer, and a written reading protects your warranty. Also call one in these cases:
- Damp walls, white salt deposits or a musty smell on the ground floor or in a basement
- A joisted floor whose build-up you don't know
- Underfloor heating without a heating protocol or without marked measuring spots
Frequently asked questions
- My underlayment already has a vapor barrier – do I still need a separate film?
- No, as long as its sd value is 75 m or more (check the data sheet) and you tape the seams tight with the underlayment's own strip or moisture-resistant tape. If the value isn't stated, or it is only a thin facing you can't tape, put a separate film underneath.
- Do I need a film under click vinyl?
- Over mineral subfloors, usually yes. Many makers of rigid-core click vinyl also require a film of 75 m or more, laid like a tray. Some products with a factory-attached underlayment handle it differently. Only the product's instructions decide.
- How far should the strips overlap and turn up the wall?
- The sources give 8 in (20 cm) up to 12 in (30 cm) of overlap, taped along the full length. At the wall, at least 3/4 in (2 cm) according to one manufacturer, 1–1.5 in (3–4 cm) above the underlayment according to the manufacturers' association. If your floor's instructions name a value, use that.
- How long does a new screed need to dry?
- It depends on screed type, thickness, room climate and ventilation. There is no honest figure in weeks. Only the measured value counts: below 2.0 CM-% for cement screed and below 0.5 CM-% for calcium sulphate screed, stricter with underfloor heating. Measure instead of counting days.
For the floor on top: last row and waste in advance
You work out the film with the formula above; for the floor on top, the planner shows you in advance how wide the last row comes out and how much waste you'll have.
Start planning
Sources
- European laminate manufacturers' association: technical leaflet on underlayment materials under laminate floors, 12/2022 (German)
- European laminate manufacturers' association: technical leaflet on laying laminate floors, 06/2022 (German)
- German industrial association for adhesives and floor-trade associations: leaflet on screed readiness (German)
- Baunetzwissen: residual moisture and readiness of screeds (German)
- Baukobox: vapor barrier and vapor retarder under DIN 4108‑3 (German)
- SBZ trade journal: vapor barrier and vapor retarder under DIN 4108‑3 (German)