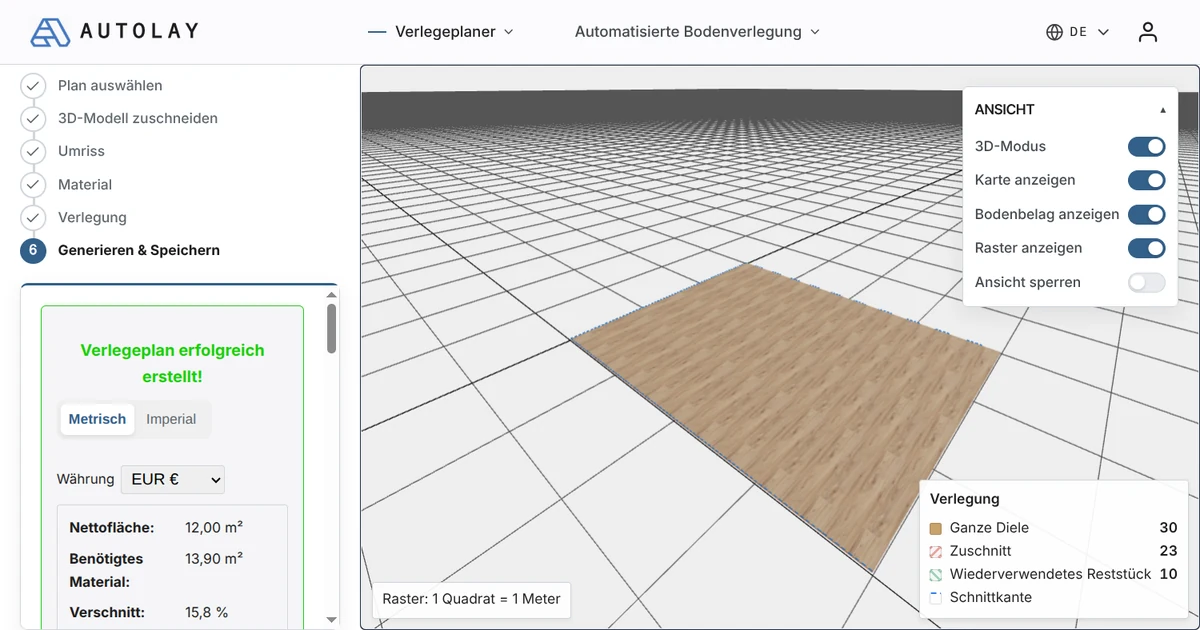


Calculate flooring material from a laser scan (LiDAR) or 3D scan
Laser scanners built into phones, photogrammetry apps and handheld laser scanners can capture a room in minutes — the hard part is turning that point cloud into a material list. Autolay imports the scan and does the take-off for you.
Try it with our 3D scan demo →From point cloud to material list
A 3D scan — from a laser-scanning app on a phone, Matterport, or a handheld laser scanner — produces a mesh or point cloud of the room, not a clean 2D floor plan. A tape measure and a hand sketch don't scale well for irregular or as-built rooms with bay windows, angled walls, or existing furniture in the way.
Autolay's three.js-based viewer loads the scan directly, lets you trace the floor boundary against the actually captured geometry, and feeds that boundary into the same layout engine used for hand-drawn rooms and rooms from a building model — so oddly shaped or as-built spaces get an accurate material count without a full manual re-measurement. This is especially useful for renovation jobs where no building model exists and the scan is the only reliable record of the room.
Where a 3D scan beats a tape measure
- Irregular rooms (bay windows, angled walls, alcoves) — the boundary comes from the actually captured surface, not an approximated sketch
- Existing buildings without a digital building model — the scan is the only accurate record
- Multi-room scans — walk through once, get boundaries and material lists for every room in the same file
Supported scan formats: glTF/GLB, OBJ, and PLY point clouds — export directly from most laser-scanning apps.
How to capture a room so the scan is worth measuring from
A take-off is only as good as the scan under it, and most unusable scans fail for the same three reasons: the room was walked too fast, the light was too flat, and the loop was never closed. A laser-scanning app on a phone or tablet builds the room by tracking its own position frame by frame; every time it loses that track it guesses, and the guess shows up later as a wall that bends or a floor that slopes.
Walk the room once around the perimeter at roughly the pace of a slow stroll, holding the device at hip height and angled slightly down so the floor–wall junction stays in view. That junction is the line the boundary will be traced along, so it is the one surface that has to be captured cleanly. Come back to your starting point and overlap the first few feet again: that closes the loop and lets the app correct accumulated drift instead of leaving it in the mesh.
- Turn the lights on and open the blinds — the laser scanner handles darkness, but the camera track that positions it does not.
- Keep at least three feet of clear floor along the walls; a scan taken over stacked boxes records the boxes, not the floor.
- Move furniture you can move, and scan the gap behind what you cannot — the floor still has to be laid under it.
- Scan glass, mirrors and gloss doors from an angle; head-on they return the reflection instead of the surface.
- For rooms longer than about 25 ft, walk the perimeter twice rather than once — drift grows with distance, not with time.
Check the scale before you trust the area
Scan apps report dimensions with a confidence they have not earned. A scan that drifted by two percent over a 20 ft room is off by nearly 5 in on the long wall, which is a plank and a half — enough to change the pack count and to make the cut list wrong at the far end. The check that catches it takes thirty seconds and a tape measure.
Before you leave the room, measure one long wall by hand and write the number down. After you import the scan into Autolay, trace that same wall and compare. If the two agree within a half inch or so, the whole scan is trustworthy, because scale error is global: it does not affect one wall and spare the rest. If they disagree, rescan rather than scale the model — a stretched scan hides its error in the corners, where the cuts are.
The second check is squareness. Trace the outline and look at the corners the room is supposed to have at 90°. A scan that closed its loop badly leaves them at 87° or 93°, and every course of planks then walks out of parallel with the wall as it crosses the room.
Which export format to pick: GLB, OBJ or PLY
Most scanning apps offer several exports and none of them explain the trade-off. Autolay reads glTF/GLB, OBJ and PLY point clouds, so the choice is about what survives the trip, not about compatibility.
GLB is the default worth using. It packs geometry and textures into one binary file, loads fastest in the browser viewer, and carries the metric scale the scanner recorded. OBJ is the safe fallback when an older app writes malformed glTF, but it splits textures into side files that are easy to lose and it stores coordinates as text, so the same room can be five times the file size. PLY is the right pick when you want the raw point cloud rather than a reconstructed mesh — useful for rough or cluttered rooms where the app's meshing invents a floor that is not there.
- GLB — one file, textures included, fastest to load. Use this unless something breaks.
- OBJ — widest app support, but keep the .mtl and texture files next to it.
- PLY — the unreconstructed points. Best when the mesh looks smoothed over furniture or debris.
- Decimate to roughly 1–2 million points before export if your app offers it; beyond that the viewer gets slower without the boundary getting more accurate.
Tracing the floor boundary: what counts as floor
The boundary you trace is the area that gets material, so the decisions at the edge are the ones that move the number. The rule that holds in almost every case: trace to the finished wall surface, then let the expansion gap and the baseboard cover the tolerance. Tracing to the plaster line behind a baseboard over-orders; tracing to the front face of the baseboard under-orders, because the plank has to run under it.
Fitted kitchens are the exception worth deciding deliberately. A kitchen run on a plinth usually does not get flooring underneath, so the boundary stops at the plinth line — but if the units may ever be replaced, laying through gives you a floor that survives the next kitchen. Islands, by contrast, almost always sit on the finished floor, so they are traced as an inclusion, not a hole.
Doorways are the third edge case. Flooring normally runs to the middle of the door leaf, where the threshold profile sits, so extend the boundary half a leaf thickness into the opening rather than stopping at the frame. Across a whole apartment that adds up: eight doors at 16 × 36 in is more than 30 sq ft that a boundary stopped at the frames would have left unordered.
From boundary to order: what the waste percentage actually covers
Once the boundary is traced, Autolay lays the material course by course inside it and counts what it had to cut. The waste percentage that comes out is that count expressed against the floor area — the offcuts the plan could not place anywhere else. It is not a safety margin, and this is the distinction that a flat 10% rule of thumb blurs.
Two things still belong on top of it. Breakage and mislaid boards on site are a handling allowance, not a geometry number, and a pack or so of spare stock for later repairs is a decision about the future rather than about this room. Both are worth adding consciously; neither is what the planner is measuring.
The plan's real payoff is the cut list. It names each cut piece, its length, and which offcut it comes from, so the fitter can work down the list instead of re-deciding at every course — and the pieces that were meant to be reused at the far wall actually get reused, which is where the computed waste percentage stops being a number on a screen and starts being material that was not bought.
Frequently asked questions
- What scan file formats can I upload?
- Autolay reads glTF/GLB, OBJ, and PLY point clouds — the formats most phone and handheld laser-scanning apps export directly, so a scan uploads without any conversion step.
- Do I need special hardware, or does a laser scan from a phone or tablet work?
- No dedicated scanner is required. A laser-scanning app on a phone or tablet, a photogrammetry app, or a handheld laser scanner all produce a mesh or point cloud that Autolay can import.
- What do I get back from the scan?
- You trace the floor boundary on the captured geometry, and Autolay returns an exact piece count and waste percentage before you order. A single multi-room scan yields a boundary and material list for every room in the same file.
- How accurate is a phone laser scan compared with a tape measure?
- A carefully walked phone scan of a normal room typically lands within 3/8 to 3/4 in per wall, which is well inside the tolerance an expansion gap absorbs. The error that matters is drift over distance, so check one long wall against a tape measure before you trust the area — scale error is global, so if that wall matches, the rest of the scan does too.
- Can I scan a whole apartment in one pass, or should I scan room by room?
- Both work. A single walk-through keeps the rooms in one coordinate system, which is what you want when the same floor covering runs through several rooms and the courses have to line up across the thresholds. Room-by-room scans are more forgiving of tracking loss and easier to redo when one room comes out badly, so they suit cluttered or awkward jobs better.
- The scan captured furniture I cannot move. Is it still usable?
- Yes. You trace the floor boundary yourself against the captured geometry, so a wardrobe in the corner does not have to become a hole in the plan — you decide whether the floor runs under it and trace accordingly. What does need care is the floor–wall junction behind the obstruction: scan the gap from an angle so the wall line is visible, or measure that stretch by hand and correct the outline after import.
- Does the scan need textures, or is bare geometry enough?
- Bare geometry is enough for the take-off, because the boundary is traced against the surfaces and the material list follows from that. Textures are still worth exporting: they make it far easier to recognize a doorway, a plinth or a step in the viewer weeks after the site visit, which is exactly when the edge decisions get revisited.
- How large a file can I upload, and where is it processed?
- Scans are loaded and traced in your own browser by the three.js viewer; the file is then uploaded with the traced outline – up to 50 MB without an account, up to 200 MB with a free account. Most single-room scans land between 20 and 150 MB. If a scan is over the limit or feels sluggish, decimate it to one or two million points before exporting; the boundary does not get more accurate above that.
Take-off without re-measuring
No other flooring calculator in this space reads 3D scans directly. For anyone already working with laser scans or photogrammetry, this cuts out the detour through manual measurement and re-tracing in drawing software entirely.